Manually Overriding Versions and Licenses
Overriding Versions
If you modify a component to mitigate a vulnerability, either by turning off options in the build or changing the source code directly, you can tell Black Duck Binary Analysis about your customized version.
You can override versions by file content or by file path.
To create a component version override:
- From your group, choose the application.
- Select the component to expand the view.
- Find Version near the top of the component view.
- Select the Edit button to the right of the version number.
- Select By file content or by By file path.
- In the new version text field, enter a new version number. Append an
underscore (
_) and any identifier that you wish.For example, if Black Duck Binary Analysis identified the version as
1.0.1f, you could change the version to1.0.1f_myvendor1_20140202. - If you selected By file path, enter the file path for your uploaded file. Use of globs for filepaths is supported.
- In the Scope field pulldown menu, designate the scope of this change.
(Scope is a mandatory field.) How widely do you want the version override to
be applied? The options:
- Only for this application.
- Group -- applies the change any time the same component is encountered in this group.
- All my groups -- applies the change for this component across every group you currently belong to.
- Global -- applies the change to every group in your organization.
- To apply the values, select the Create overrides button.
For subsequent scans, Black Duck Binary Analysis behaves exactly as you expect: If it finds the same component fingerprint, it will identify the component with your overridden version number and remember which vulnerabilities are excluded in that version. Thus, if you have a company-specific build of a certain library, you just have to change the version and triage vulnerabilities once; subsequent scans will identify the customized component correctly.
Overriding Licenses
It is possible to override the license information for a component. This might be useful if the license is listed incorrectly or as unknown, or if the component is covered by multiple license options.
Note that you cannot override the license information if the component's Version field is empty.
To create a component license override:
- From your group, choose the application.
- Select the component to expand the view.
- Find License near the top of the component view.
- Select the Edit button to the right of the license name.
- From the License pulldown menu, select the new license.
- In the Scope field pulldown menu, designate the scope of this change.
(Scope is a mandatory field.) How widely do you want the license override to
be applied? The options:
- Only for this application.
- Group -- applies the change any time the same component is encountered in this group.
- All my groups -- applies the change for this component across every group you currently belong to.
- Global -- applies the change to every group in your organization.
- To apply the values, select the Add button.
Reviewing Overrides
You can review all the overrides that apply to any component by navigating to the same area you would use to change them:
- From your group, choose the application.
- Select the component within that app that you want to know about.
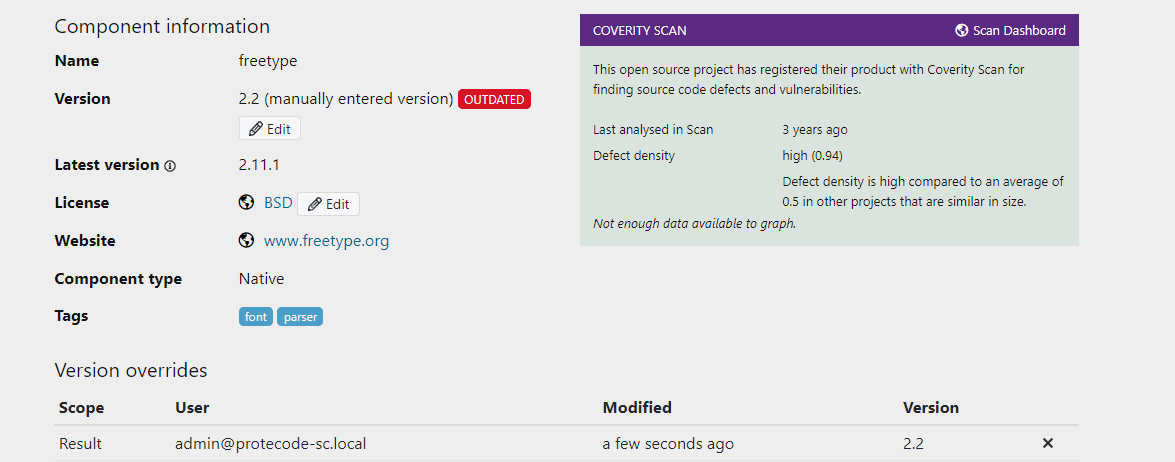
- On the Component information page, the version overrides are displayed under each component.
All the applicable overrides, and their scopes will be visible. If a file has multiple overrides, the one with the lowest level of scope takes precedence.
Removing Overrides
You can remove all the overrides that apply to any component by navigating to the same area you would use to change them:
- From your group, choose the application.
- Select the component within that app that you want to know about.
- On the Component information page, the overrides are displayed under each component.
- Click on the x next to the override to remove it.