
User Accounts
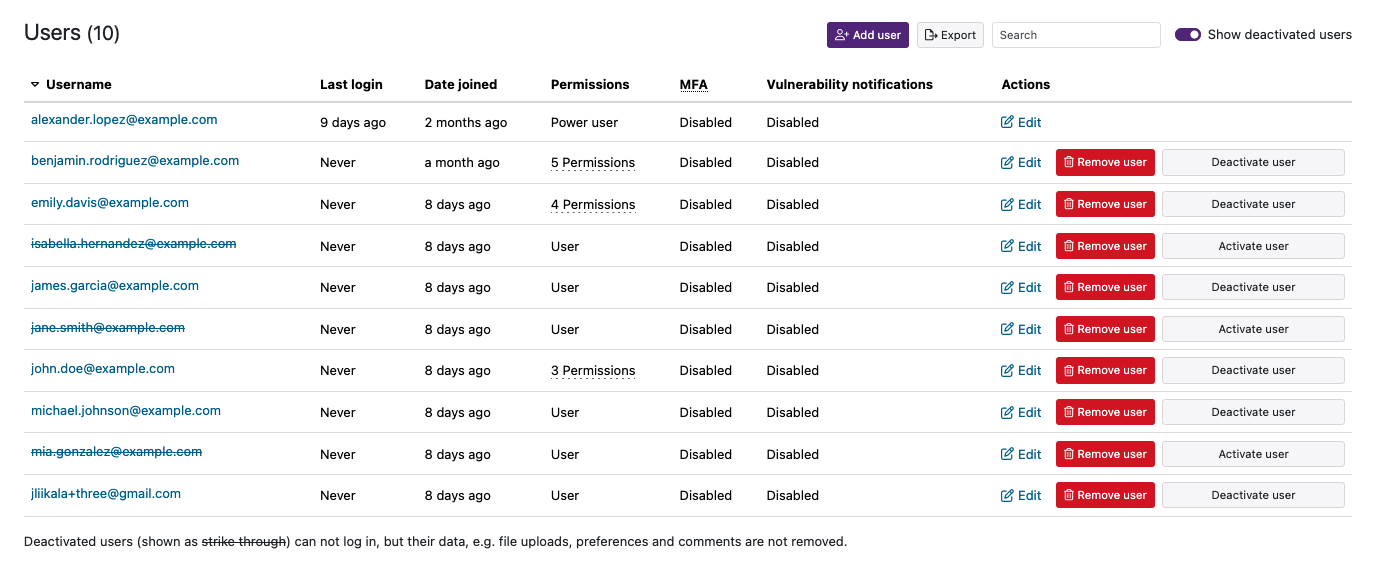
The Users page displays the active user accounts. You can sort the contents of the page by clicking on the column headers. You can use the Show deactivated users toggle switch at the top of the page to toggle active/inactive users or only active ones.
Creating User Accounts
The administrator can add user accounts. New user accounts must be assigned to at least one group at time of creation. Therefore, when creating a user account, you should make sure that a target group already exists.
To create a new user account:
-
Select Manage users from Shortcuts. Then click on Add user.
-
Enter the user account email address, and select one or more groups to which to assign the new user.
-
Select Invite.
-
Copy the link displayed in the confirmation message that appears near the bottom of the page. Your new user will need this link in order to change their password.
Deactivating User Accounts
User accounts can be deactivated from the Users page. Deactivated accounts can be later reactivated. Deactivated accounts retain all related information.
To deactivate a user account:
- Navigate to Manage users.
- Search for the user you wish to deactivate.
- Select Deactivate.
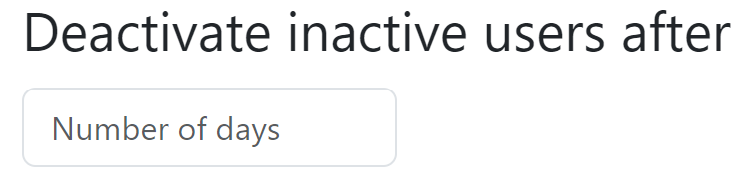
Deactivating Inactive Users
You can set when inactive users are deactivated from the Deactivate inactive users after input field. You can find it under Account settings > Users. The minimum number is 30 days and leaving the field empty means that inactive users are not deactivated. If a user has never logged in, the deactivation time will be counted from the account creation (user added) date.
Removing User Accounts
User accounts can be removed from the Users page. Removed accounts cannot be later reactivated. Removed accounts lose all associated data.
To remove a user account:
- Navigate to Manage users.
- Search for the user you wish to remove.
- Select Remove user.
- You can review the data to be removed by clicking on the link.
Figure 3. Remove user 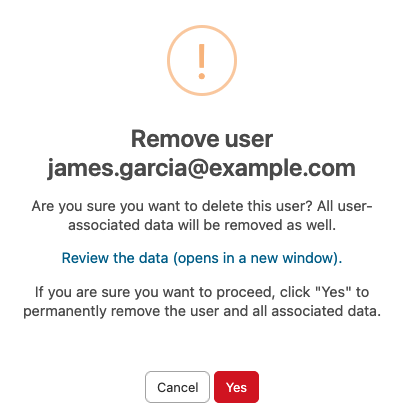
- Click on Yes to remove the data.